Space Redistribution - Prerestorative orthodontics
ORTHODONTICS IN GENERAL PRACTICE
3 min read
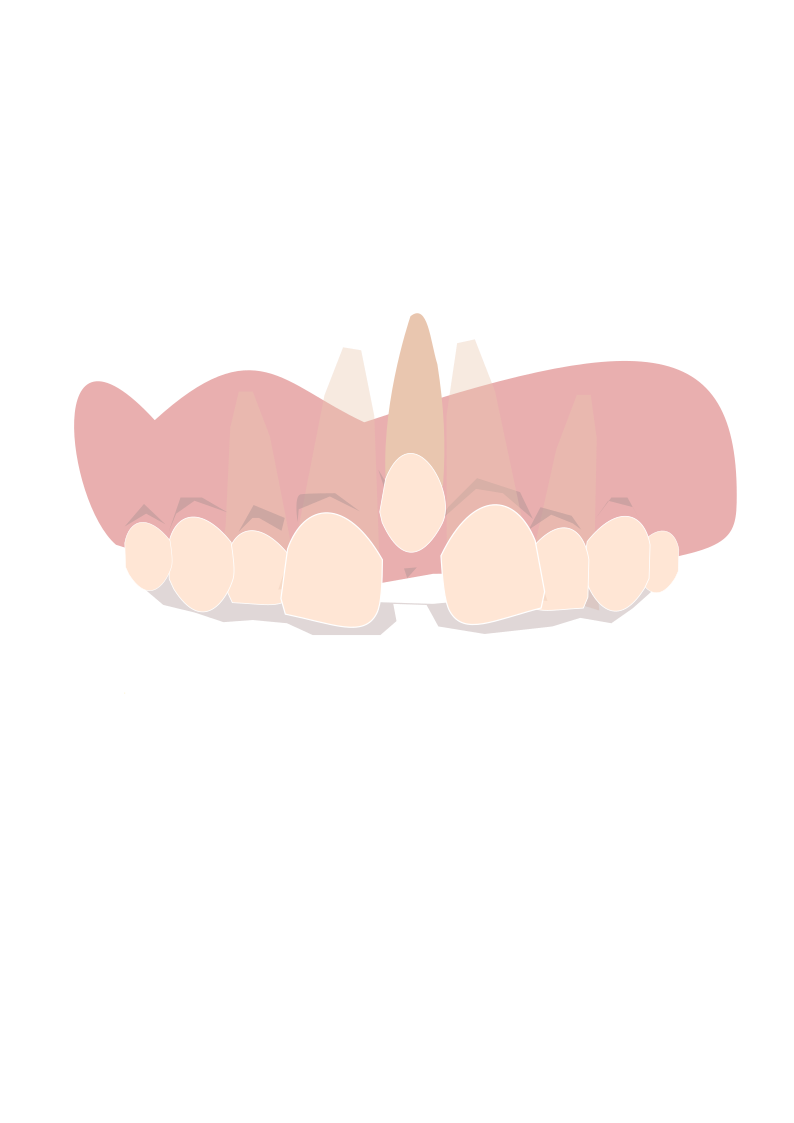
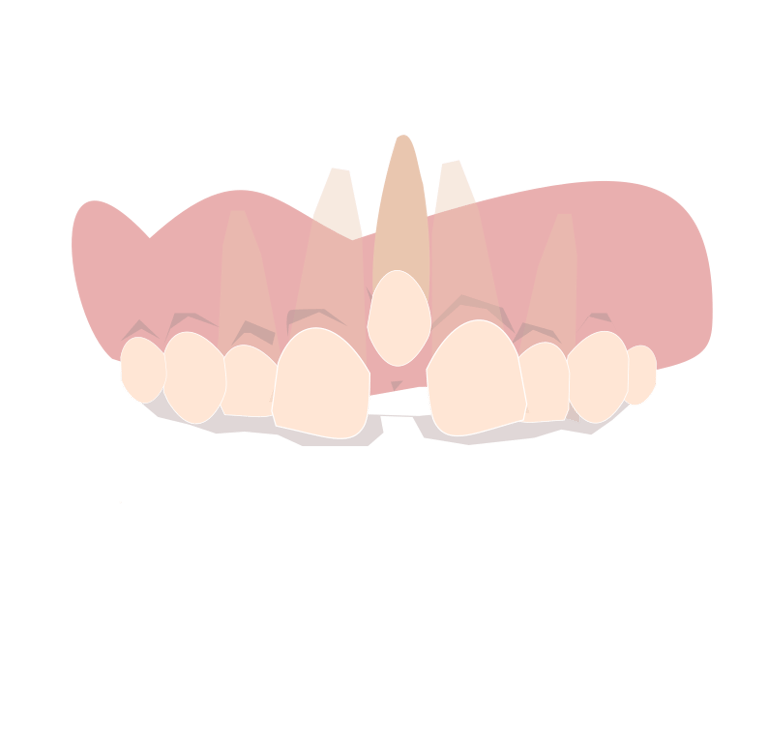
In certain diastema cases, especially those involving larger spaces, direct composite restorations without any pre-restorative orthodontic treatment can be quite challenging. However, orthodontic intervention doesn’t always have to be extensive or time consuming particularly when the goal is purely aesthetic. In such scenarios, we often employ targeted mechanics focused only on the area of concern to help us achieve optimal cosmetic results efficiently.
In this article, we’ll explore how space redistribution can be used to bring the central incisors closer together, making the case more suitable for aesthetic closure with composite restorations.
One way to achieve this space redistribution is by using clear aligners, a more straightforward and less noticeable method. However, while aligners are effective, they can be a bit costly for some patients. We’ll cover their use in space redistribution in a separate article.
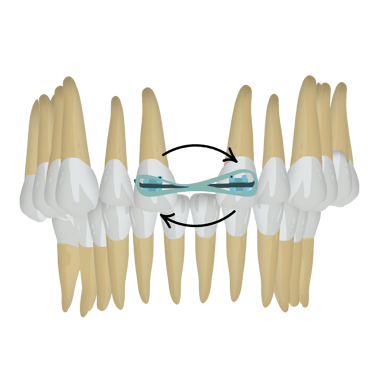
In this post, our focus will be on a more accessible and cost-effective approach: using just two brackets on the central incisors to gently move them closer together in preparation for composite bonding. note that this is just one method from many methods that can be used. but we can say that this is the simplest of them.
Before you start !
Before we start doing anything orthodontically a periapical xray is important to check for a mesiodense !
How common is having a mesiodense?
The 2nd most common cause for a midline diastema is a Mesiodense (23%) after high labial frenum (34%)
Do i need lateral Ceph ?
No, lateral ceph is usally needed in comprehensive treatment were significant skeletal or dental movements are going to be done
Do i need a DPT ?
Since the treatment will involve targeted mechanics in a specific area, a full scan won't be necessary. A periapical radiograph of the region will be sufficient, which helps minimize the patient's exposure to unnecessary radiation and avoids additional costs.
Procedure:
Bonding Protocol for Diastema Closure Using Preadjusted Edgewise Brackets (0.022-inch Slot):
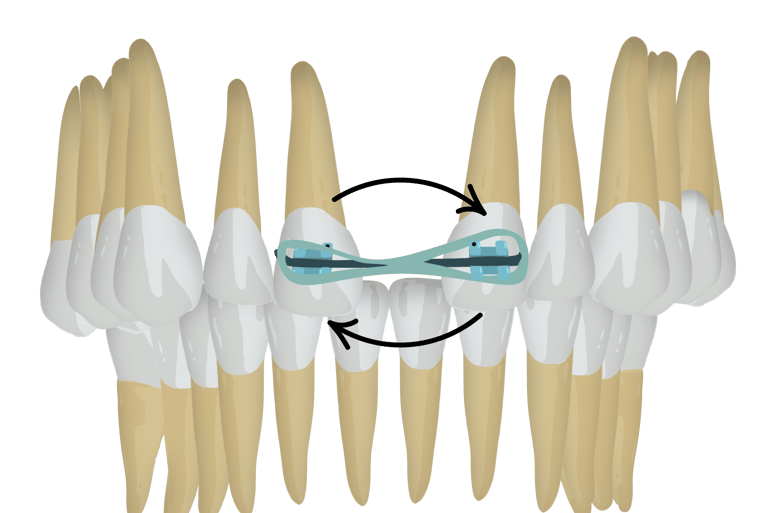
Begin by bonding preadjusted edgewise MBT brackets (0.022-inch slot) on the maxillary central incisors. It is preferable to switch the brackets placing the right bracket on the left incisor and the left bracket on the right incisor to optimize the expression of desired tooth movement.
Ensure the brackets are bonded passively, i.e Wire is inserted easily with no force applied on any of the 2 centrals , you can do this by inserting the wire in the brackets slots before light curing and adjusting the brackets accordingly
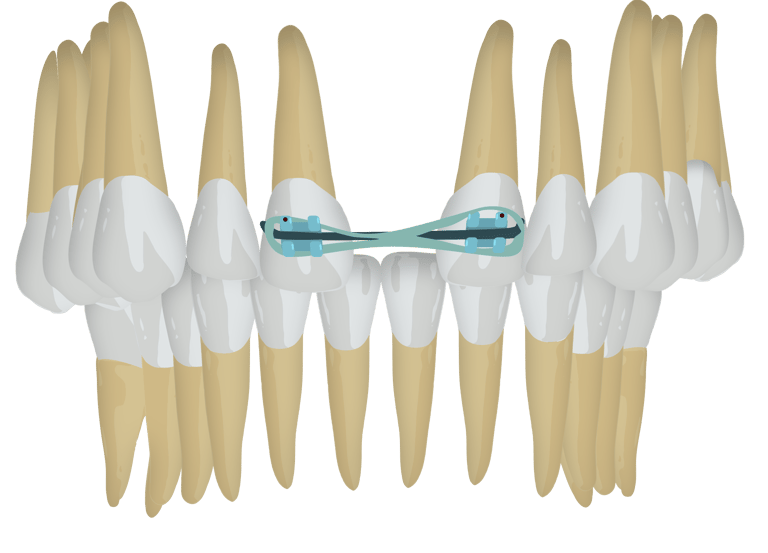
cut a 0.019 x 0.025-inch stainless steel (SS) archwire as big as the span of the 2 bonded brackets then insert the wire and secure it using steel ligatures to ensure stability.
In some cases you might not be able to add a 0.019 x 0.025-inch stainless steel wire from the first visit due to significant malalignments , in this case you start by applying lighter wires like and 0.016 x 0.022 NiTi until you work your way upto 0.019 x 0.025-inch stainless steel (SS)
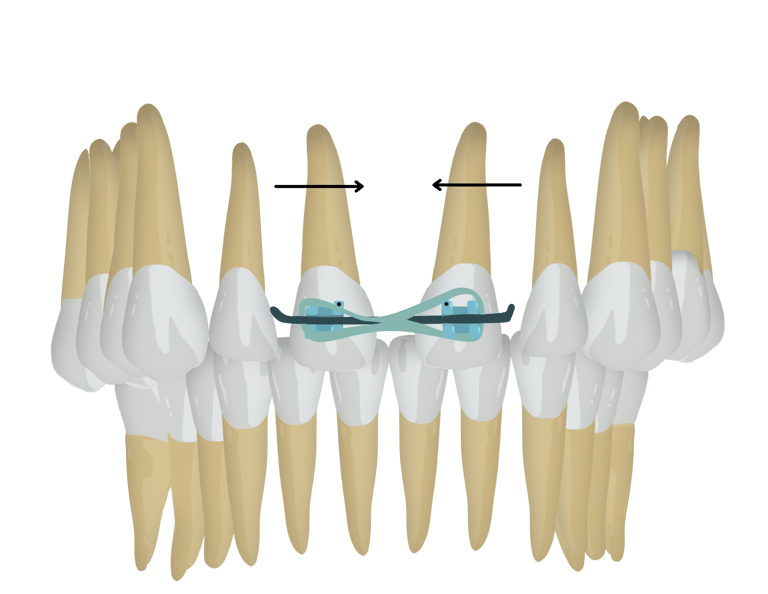
To initiate diastema closure, after you have applied your 0.019 x 0.025-inch stainless steel (SS) archwire. Place a power chain across the central incisors.
Keep the forces very low , we need about 30-60g of force only , the less the force the faster the movement!
Schedule follow-up appointments every 15 days, and continue to monitor and adjust until the space is adequately reduced to allow for a well-distributed composite build-up across the incisors.
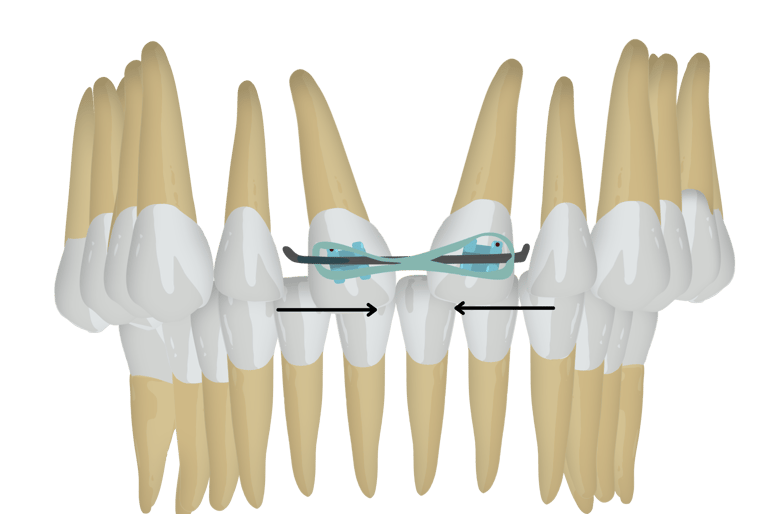
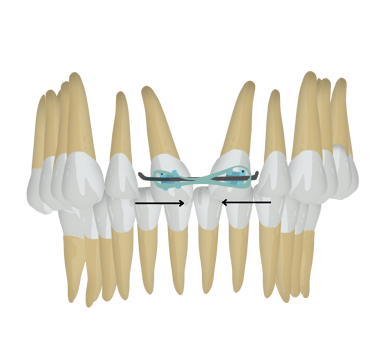
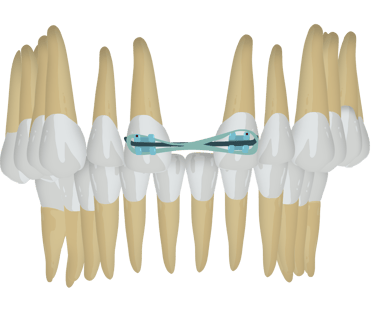
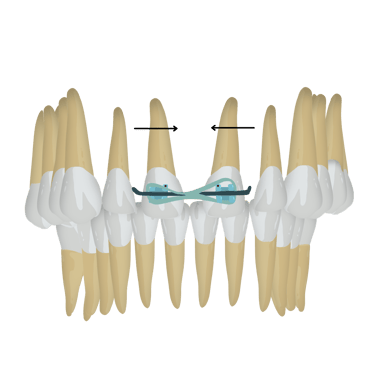
Closing the diastema without switching brackets
Closing the diastema with switching brackets
If you would like to know more details about the Procedure (for eg. How to bond the brackets , What are MBT Brackets, what are the instruments needed) please do tell us in the "Request topic" Section in the Home Page!


Also Check Out Our Products!